
B'stilla is thought to be the national dish of Morocco. It is almost always served at weddings. Legend has it that this dish originated in the city of Fez. Authentically the recipe calls for using squab (a young pigeon), but you can use chicken thigh meat as this recipe calls for. Chicken breasts don't work very well as they easily dry out. This is not a particularly easy dish to make, but it doesn't really require any special skills, just a good attention to preparation details.
Basically B'stilla is a sweet and savory meat pie with a filo dough crust. The combination of ingredients and resulting flavors is quite interesting. As my wife said rather enthusiastically, "It's a keeper!
Ingredients:
- 1 tablespoon olive, canola or grapeseed oil
- 2 1/2 pounds boneless skinless chicken thighs
- 1 cup of chopped shallots or 1 medium yellow onion, chopped
- 1 cup of yellow raisins
- 3 garlic cloves, crushed
- 1/2 teaspoon saffron threads
- 1 teaspoon ground cumin
- 1 teaspoon ground ginger
- 1 teaspoon ground turmeric
- 1 teaspoon cinnamon
- salt (to taste)
- 2 cups chicken stock
- 3/4 cup slivered almonds
- 3 eggs, lightly beaten
- 1 cup coriander leaves, roughly chopped
- 1 cup flat-leaf parsley leaves, roughly chopped
- 1 stick of butter, melted and cooled somewhat
- 8 sheets filo pastry, unfrozen but kept refrigerated until used
- 1 tablespoon of regular sugar
- icing/confectioner's sugar
- Enough cinnamon for the top decoration
Important Preparation Notes:
It is good cooking practice to measure out all ingredients first, putting each ingredient in its own separate bowl. Spices, however, can be measured out and put in a single bowl.
If you follow this recipe step by step, you will end up eating sometime around midnight. Read through the entire recipe first and you will see that while the filling mixture is simmering, you can be preparing other ingredients.
Preparation (part 1)
- 1 Heat 1 1/2 tablespoons oil in a large frying pan over medium heat.
- Add chicken thighs and brown on all sides.
- Remove chicken from frying pan.
- Add remaining oil to pan. Add onion and cook, stirring often, until soft.
- Add garlic, saffron, cumin, ginger, salt and cinnamon.
- Stir and cook for 1 minute or until aromatic.
- Add chicken stock and bring mixture to a boil.
- Return chicken to frying pan, cover, reduce heat and simmer. Stir pot every few minutes while it is cooking.
- After 30 minutes, turn off heat, remove chicken from pan.
- While the above filling is cooking, coarsely grind -- with a mortar and pestle or a spice grinder -- the slivered almonds.
- Put resulting almond meal in a frying pan and heat over medium-low heat.
- Stir almond meal often, until light golden.
- Transfer almond meal to bowl so that it stops roasting and doesn't burn.
- Mix into the almond meal a teaspoon of regular cinnamon and a tablespoon of regular sugar.
- Pre-heat oven to 375 degrees.
- When chicken is cool enough, shred it with a fork and return to the frying pan.
- Once again, bring mixture in pan to a simmer.
- Stir in coriander, parsley and raisins to chicken mixture.
- After these ingredients have been mixed, continue stirring mixture while slowly adding beaten eggs.
- Simmer mixture, stirring frequently to avoid burning, until the moisture is driven off and the mixture is moist but no longer watery.
- Turn off heat to frying pan.
Preparation (part 2)
You will now create the "pie" with the filo dough. It is important that the dough does not dry out while assembling the pie. You can prevent this by laying out the 6 sheets of dough on a flat surface and covering them with a clean damp kitchen towel, removing sheets one at a time (and then re-covering the remaining sheets with the towel).
- With a pastry brush, lightly coat a 9 inch pie pan with butter.

This following are directions how to make a stack of filo dough in which every two layers is separated by the ground almond mixture.
- On a large flat surface (a cutting board or clean counter top), lay out one sheet of filo dough and brush lightly with butter.
- On top of this layer place another sheet of filo dough "cross-wise" (90 degrees, filo sheets are usually rectangular) from the first sheet and again brush with melted butter.
- Sprinkle a thin layer of the roasted almond mix on top of the buttered sheet.
- Place the third sheet of filo on top, (cross-wise from the last) brush with butter.
- Then place the forth sheet, this time again brushing with butter and layering with the almond mixture.
- Continue this process until you have used all eight sheets. You need not butter or festoon the final layer with the toasted almond meal (but you will use the remainder of it before you are done).
- Transfer the stack of filo sheet onto the pie pan, allowing the edges to overhang the pan. Gently press into the pan.
- Spoon the warm chicken mixture into center of filo distributing it evenly. Layer by layer fold overlapping filo over, enclosing filling.
- Place a baking sheet over the pie and very carefully flip the pie over on to the pan and then remove the pie plate.

B'stilla before and after baking
Preparation (part 3)
- Place the B'stilla on the center rack of your preheated oven and back until the filo is a pleasing golden brown.
- After about fifteen minutes, check the progress of the baking frequently so that you don't burn the dough. In Morocco, B'stilla can be deep-fat fried, but we didn't try this.
 Decorate with powdered sugar and cinnamon
- After the "pie" achieves its golden-brown perfection, remove it from the oven.
- Coat the top of the B'stilla with a generous layer of confectioner's sugar (using a sifter or a mesh strainer might make it easier) and create a design on top of this with cinnamon. We used a piece of paper rolled into a funnel to apply the cinnamon design.
- To serve, cut into pie shaped pieces. I am quite sure you will be very pleasantly surprised by how all these flavors flamboyantly interact.
Enjoy!
Recipe by T. Johnston-O'Neill
- Details
- Hits: 4585
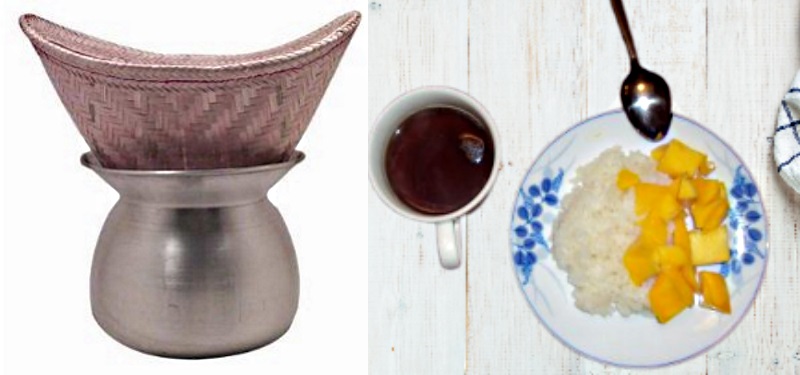
This recipe can be used with chicken, pork or fish, what makes this dish distinctive is the special rice that is used and the accompanying "dipping sauce." This meal has very simple ingredients and is relatively easy to prepare. It is enjoyed both in Laos and Thailand. The dipping sauce is very spicy, but this can be adjusted to personal preferences. Although it is commonly referred to as "sticky rice", it is more properly known and sold as "sweet rice". Please note that other varieties of rice cannot be substituted for sweet rice, they just won't work at all. Our directions call for the use of a Thai sticky rice steamer and a steaming basket. You can purchase an inexpensive steamer "kit" at the Thuan Phat Supermarket. It is possible to make sticky rice with a standard American vegetable steamer basket. We have tried both methods and although the Thai steamer works best, the other method works well too. Please note, for best results the rice should be soaked in water for 6-8 hours (or longer) before you start cooking it.
Ingredients:
- 2 cups Thai long-grain sweet rice
- 4 White meat Chicken fillets (pork firm fish fillets can be used as well
- 2 tablespoons of grapeseed, peanut or canola cooking oil
- Garlic powder, salt and pepper to taste
Dipping Sauce:
- 1-10 Thai green chilies
- 1 tablespoons of a fresh lime juice
- 2 tablespoons of Nam Pla (น้ำปลา) (Thai Fish Sauce or "Nam Pa" in Laos)
Preparation:
Prepare the rice . . .
- Rinse the rice in water several times.
- Soak the rice in water for 6-8 hours or overnight
- Fill the steaming vessel will a few inches of water (water level must be below the steaming basket)
- Drain the soaked rice and fill steaming basket with the drained rice
- Cover the rice with a pot lid and then bring the water to a boil
- Turn the heat down to medium, a gentle boil will do (the steam's the important part)
About 12-15 minutes after the rice starts to steam you will need to "roll" the rice. - Carefully remove the steaming basket from the steamer being careful not to burn yourself. Firmly grasping the edges of the steaming basket flip the rice over with a motion that is similar to flipping an egg or a pancake in a pan. This takes practice!!!! But don't worry, even if you can't get just right, the rice will still be delicious. Please note that if you are doing this in some other sort of steamer (like a folding metal vegetable steamer), the only discernible difference will be how compacted the rice is, the difference is only slight.The rice should be fully cooked in 20 - 25 minutes.
Cook the Chicken . . .
- In America it works just fine to use pan fried Chicken Breasts. If the breasts are too thick, carefully slice them in half.
- Season to taste the chicken breasts fillets with garlic powder salt and pepper and fry both sides on medium heat. Both side should be a nice golden-brown.
Sauce Preparation:
Tolerance to chilies varies greatly from person to person, you should adjust the number of chilies to the tastes of your guests. Use 1 to 10 chilies.
- Grind chilies in a mortar and pestle (Laotian style) or slice very thin (Thai style). Removing the seeds will lessen the heat a bit. It is a good idea to use rubber gloves, and whatever you do don't touch your eyes with your fingers!
- Add 1 tablespoon fresh lime juice to the ground chilies (about half a juicy lime)
- Add 2 tablespoons of the Nan Pla fish sauce.
- Serve the chicken and rice with your choice of vegetables. Authentically pieces of chicken are dipped in the sauce, but it works well if you drizzle sauce over your chicken.
Sticky Rice with Mangos:
Sticky rice with mango is a very popular and delicious dessert. It can be made with the rice left over from the recipe above. It's very easy to make. Sweeten (to taste) coconut milk with sugar and then pour the mixture over a mound of sticky rice. Top with slices of fresh mango. If you like mangos, try to find a mango slicer as slicing mangos is a bit challenging and the slicer makes it simple.
- Details
- Hits: 5113
"Creole" and "Cajun" are two terms often associated with the state of Louisiana and the city of New Orleans. The two words refer to different, although related, cultural traditions. Cajuns—who live throughout much of Louisiana—are considered to be descendants of French colonists who were exiled from the eastern maritime regions of Canada (principally Nov a Scotia, aka "Acadia" from which the term "Cajun" derives) in the late 1700's during Le Grand Dérangement. Cajun culture is not, however, purely French having been strongly influenced by Southern US cultures. "Creole,"—"a term which linguists use to denote a stable language which is a mixture of two dissimilar languages—is variously used to denote people who are; a mixture of European and African descent, Southern U.S. residents who are French descendants, or a person of European descent born in the West Indies or Latin America. In common usage there is a great deal of overlap in these two cultural terms although they are not interchangeable.
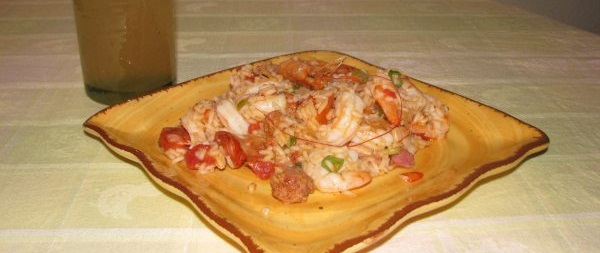
The word Jambalaya has many competing folk etymologies, but the Oxford English Dictionary considers it to be derived from the French Provençal word "jambalaia" meaning "mixture" a meaning that is well suited to its cultural milieu. Jambalaya is a dish that is thought to have originated in the European quarter of New Orleans, now commonly known as the "French Quarter" or simply "The Quarter". Although originally established by the French, much of the present day historical architecture was built during subsequent Spanish rule as many of the original French buildings were destroyed by fires in 1778 and 1794. It is likely that Jambalaya was a New World approximation of Spanish Paella in which tomatoes were substituted for saffron. Jambalaya, like the architecture and the inhabitants of the city of New Orleans, regales in the complementary blending of diverse elements and cultures.
Unlike Cajun style Jambalya, Creole style Jambalaya is cooked with tomatoes. Another difference is that Cajun jambalaya, also known as "Brown Jambalaya," is darker in color due to generous browning of the meats and is generally spicier than its Creole cousin. Unlike other dishes in Louisiana (notably gumbo and étouffées), but similar to Paella, rice is integral to the dish itself. Differing from its culinary ancestry, Paella, Jambalaya is cooked with long grain, not short grain, rice. As you can see from the directions below, preparation is quite easy and relatively quick. Variations of ingredients abound, so feel free to experiment!
Ingredients:
- 4 cups chicken stock
- 1/2 pound diced chicken (white or dark)
- 1/2 pound diced smoked ham (diced)
- 1/2 pound diced or sliced Chaurice, Andouille or other smoked spicy sausage.
- 1/2 pound shrimp (peeled and de-veined, or whole)
- 1 cup chopped yellow onions
- 1 (14 once) can of diced tomatoes
- 4 scallions sliced
- 1 large bell pepper (red, green or both) diced
- 3 cups long-grained rice
- 1 bay leaf
- 1/2 teaspoon paprika
- 1 tablespoon. chopped parsley
- 1 teaspoon thyme (crush with your fingers)
- 1 teaspoon chopped garlic
- Salt and pepper to taste
- Tabasco sauce, other hot sauce, or cayenne pepper to taste
Preparation:
- Sauté over medium heat ham, sausages, chicken and onions in 3-quart saucepan until sausages are browned and onions are translucent.
- Add bell pepper and garlic. Continue to sauté until vegetables are wilted, 3-5 minutes
- Add rice, chicken stock, tomatoes and spices.
- Bring to a boil, then reduce to a gentle simmer, cover pot and cook for 10 minutes
- Add shrimp and green unions, mix well, cover and cook an additional 5 minutes
- Add parsley, mix, and serve.
Enjoy!
Recipe by Tom Johnston-O'Neill
Photo by Shari K. Johnston-O'Neill
- Details
- Hits: 4973
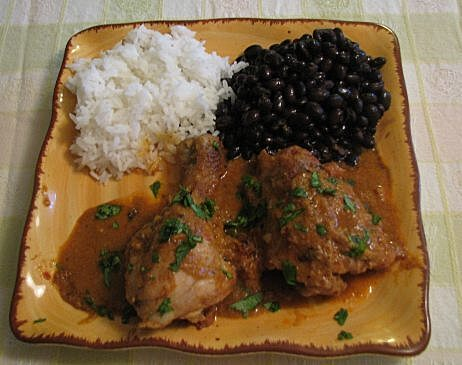
Cinco de Mayo celebrates the 1862 victory of Mexican forces over the French army in the "Battle of Puebla." This battle pitted a poorly equipped Mexican militia against a much larger French force. The victory was rather short-lived as upon news of the French defeat in Puebla, Napoleon III dispatched a much larger force of 30,000 troops to conquer much of Mexico. French rule lasted a mere 3 years, as American and Mexican worked together to expel the French. While Cinco de Mayo is somewhat celebrated throughout much of Mexico, it is most exuberantly celebrated in Puebla. Cinco de Maya has also become a widely celebrated event in the United States, particularly, but not exclusively, in the Southwest. It is often mistakenly understood as Mexican Independence Day which is on September 16th although the complexity of the process in which Mexico became an independent country make setting an exact date a bit problematic. In the United States, Cinco de Mayo is somewhat similar in meaning to St. Patrick's day, more of a celebration of culture than a celebration of a specific meaningful event. Pollo Encacahuatado is a regional specialty of Puebla.
Ingredients:
- 4 tablespoons of corn oil
- 1 whole chicken, cut into serving pieces
- 1 cup of diced tomatoes (or 2 Roma tomatoes, skinned)
- 1/2 medium yellow onion, and chopped
- 2-3 garlic cloves, peeled
- 1/2 cup shelled roasted peanuts (remove skins if necessary)
- 1 Ancho chili (dried Pablano chili), seeded, de-veined and soaked in warm
water until soft (about 10 minutes) - 1 teaspoon of ground cinnamon
- 1 (14 once) chicken broth (one can)
- 1/2 tablespoon of chopped cilantro for garnish
Preparation:
- Season chicken pieces with salt and pepper.
- In a large saucepan, saué chicken 3 tablespoons of oil until golden brown. While the chicken is browning:
- In a food processor, puree chili, onion, garlic, and one tablespoon of oil. the mixture should be smooth. Set aside mixture and rinse processor.
- Now puree the roasted peanuts, tomatoes, and cinnamon in the food processor.
Add water if necessary to make the mixture smooth. - Remove browned chicken pieces from the skillet and set aside.
Drain excess oil from pan so that only a tablespoon or two remains - Add chili/garlic/onion mixture to pan and cook on medium heat for 5 minutes stirring frequently
- Add peanut/tomato/cinnamon mixture and broth to pan and mix well.
- Add chicken and cook over low heat for 35-40 minutes turning chicken pieces halfway through.
- Garnish with cilantro and serve with rice, beans and hot corn or flour tortillas.
¡Buen Apetito!
Recipe by T. Johnston-O'Neill
- Details
- Hits: 4063
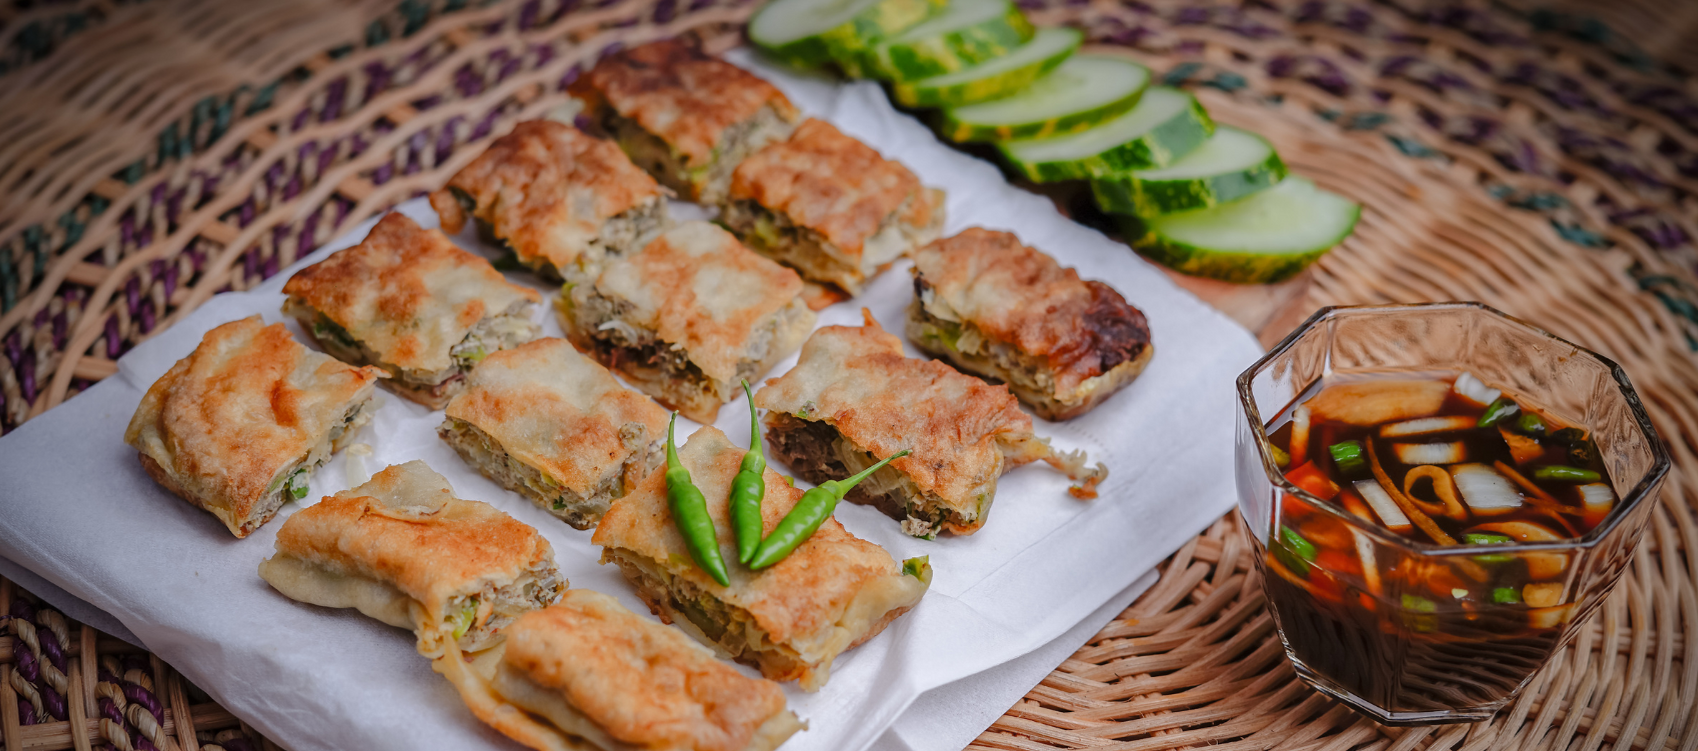
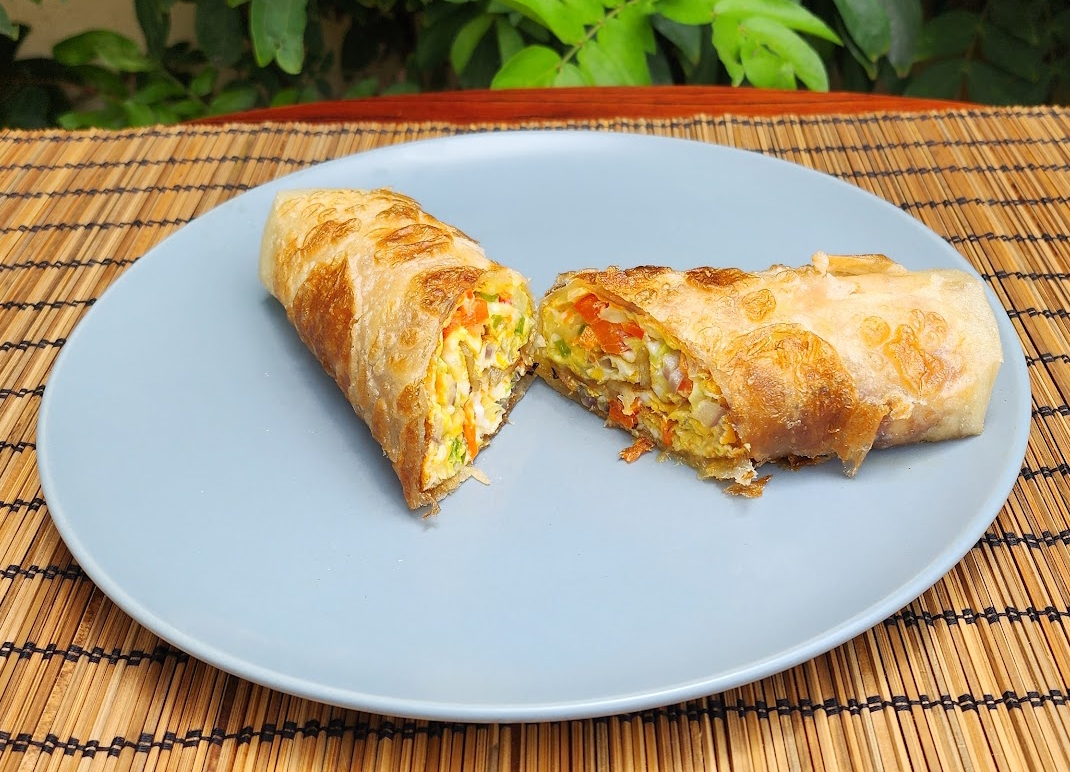
Many Indonesians survive the often sultry evenings by eating out with their friends or family with food from mobile roadside eateries called kaki lima (five feet) or at small eateries known as warung. These eateries serve a variety of dishes including; noodle soup (soto), skewered meat (sate), fried tofu with chili sauce (tahu goreng), deep-fried bananas (pisang goreng). A popular snack dish (but it can be a whole meal) in the Sumatran coastal town of Padang is martabak. The dish is believed to have originated in Deli, India. It is variously known as murtabak (Malaysia) mutabbaq (Saudi Arabia). In Indonesia martabak comes in sweet (martabak manis) and savory version that resembles a crispy fried crepe with a curried meat and vegetable filling. It is often served with a "mixed pickle" (acar segar) sauce that can either be sweet, vinegary or a combination of both. Expert martabak vendors are able to fry the "crepe," add the filling and finish by folding the crepe. The following recipe uses an easier method of making a small folded package and then frying it on both sides.
Ingredients:
Dough:
- 2 cups general purpose flour
- 3 tablespoons cooking oil (peanut, canola or grapeseed)
- 3/4 cup water
- 1/2 teaspoon salt
Filling:
- 2 tablespoons cooking oil (peanut, canola or grapeseed)
- 4 cloves of garlic (minced)
- 1 pound ground beef, lamb or chicken
- 1 cup diced shallots (or yellow onion)
- 1 small leek (white & some of the green) halved and sliced very thin
- 1 scallion thinly sliced
- 1-3 red Thai chilies seeded and sliced very thin
- 3 tablespoons of minced celery leaves
- 4 large eggs lightly whisked
- 1 tablespoon curry powder
- 1/2 teaspoon of salt
- 1/2 teaspoon of white pepper
Mixed Pickle Ingredients:
- 1 cucumber, peeled, de-seeded and cut into matchsticks
- 1 medium carrot, peeled and cut into matchsticks
- 10 shallots (small size) peeled and quartered (fewer if using large shallots)
- 1 cup diced fresh pineapple
- 1 cup of water
- 4 tablespoons white vinegar
- 1 tablespoon sugar
- 1 teaspoon salt
Preparation:
Dough:
Mix and knead all of the dough ingredients. Place dough in a mixing bowl, cover the bowl and set aside for 2 hours.
Mixed Pickle:
Mix all of the ingredients in a bowl. This concoction actually improves with age. If you keep it refrigerated for 2 to 3 days before using it will develop its full flavor.
Martabak:
- Add oil in a frying pan or wok to frying temperature
- Add garlic for a half a minute
- Add ground meat and fry for 2 minutes
- Add the shallots, leek, chilies, celery leaves and curry powder and fry until meat is completely cooked
- Remove from heat, add scallion, salt, pepper and egg
- Divide dough into four equal portions
- Form each dough portion into a ball
- With an oiled rolling pin roll one of the balls into a very thin tortilla shape
- Fill each tortilla with the filling mixture and fold over the edges to make a thin square package
- Fry each martabak in about 1/4 inch of oil heated to a medium high temperature. The oil should not exceed 350 degrees, or else the wrap will burn
Serve the martabak with the mixed pickle.
Selamat Makan! (happy eating!)
Recipe adapted from Authentic Recipes from Indonesian by Heinz von Holzen and Lother Arsana
Photo byShari K. Johnston-O'Neill
- Details
- Hits: 5272
Joomla!
Extensions
The Joomla! content management system lets you create webpages of various types using extensions. There are 5 basic types of extensions: components, modules, templates, languages, and plugins. Your website includes the extensions you need to create a basic website in English, but thousands of additional extensions of all types are available. The Joomla! Extensions Directory is the largest directory of Joomla extensions.
Components
Components are larger extensions that produce the major content for your site. Each component has one or more "views" that control how content is displayed. In the Joomla administrator there are additional extensions such as Menus, Redirection, and the extension managers.
Modules
Modules are small blocks of content that can be displayed in positions on a web page. The menus on this site are displayed in modules. The core of Joomla! includes 24 separate modules ranging from login to search to random images. Each module has a name that starts mod_ but when it displays it has a title. In the descriptions in this section, the titles are the same as the names.
Content Modules
Content modules display article and other information from the content component.
User Modules
User modules interact with the user system, allowing users to login, show who is logged-in, and showing the most recently registered users.
Display Modules
These modules display information from components other than content and user. These include weblinks, news feeds and the media manager.
Utility Modules
Utility modules provide useful functionality such as search, syndication and statistics.
Navigation Modules
Navigation modules help your visitors move through your site and find what they need.
Menus provide your site with structure and help your visitors navigate your site. Although they are all based on the same menu module, the variety of ways menus are used in the sample data show how flexible this module is.
A menu can range from extremely simple (for example the top menu or the menu for the Australian Parks sample site) to extremely complex (for example the About Joomla! menu with its many levels). They can also be used for other types of presentation such as the site map linked from the "This Site" menu.
Breadcrumbs provide users with information about where they are in a site.
Page 19 of 29